When creating presentations in Google Slides, you may want to use some of the available shapes to accentuate certain words or important points. Shapes can be beneficial, whether an arrow pointing to a phrase or a box surrounding key terms. Sometimes, you’ll need to arrange them in opposite or flipped directions. Today, we’ll examine some different steps for flip options and how to achieve these shape moves.
Simple steps for Adding shapes
Before we flip or move any shapes, we need to know how to add shapes to our slides. Find the toolbar menu at the top of the page. There is an icon that looks like a circle with a square behind it. The square is partially obstructed. When you float over the icons, their names will appear. Click shapes and you’ll see a list of shape names in the drop-down menu.
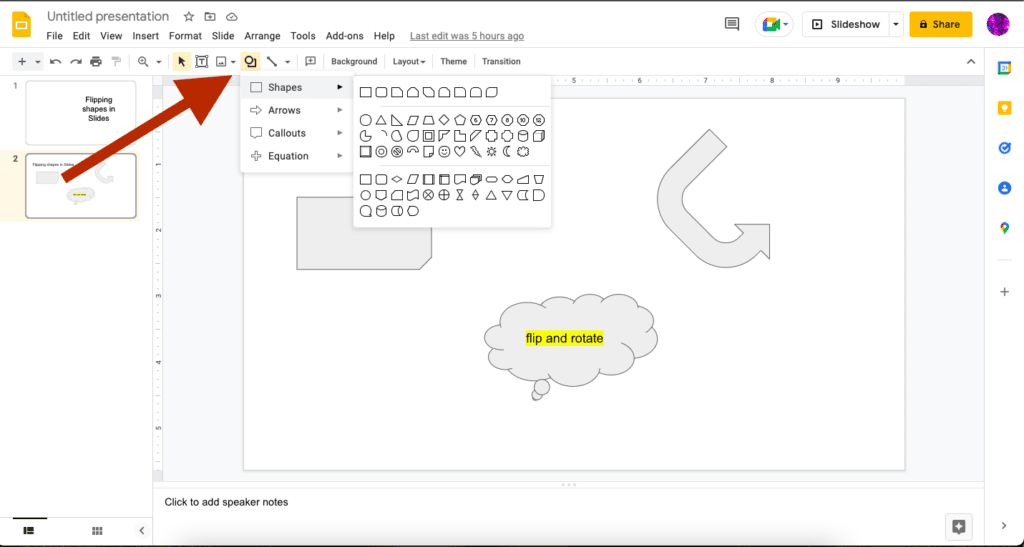
Spend some time looking through the range of shapes, images, and drawings options, when you have time. For this article, I’ll pick three shapes. I’m choosing three shapes that aren’t symmetrical, so we should notice when they’re flipped.
Slides and the toolbar menu
The toolbar at the top of the Slides page is an important accessory for working with the program.
Make sure you have selected the shape you want to move by clicking it. A blue parameter outline called a bounding box will appear around the shape. This is also an option for moving shapes that we’ll cover later.
Arrange tab
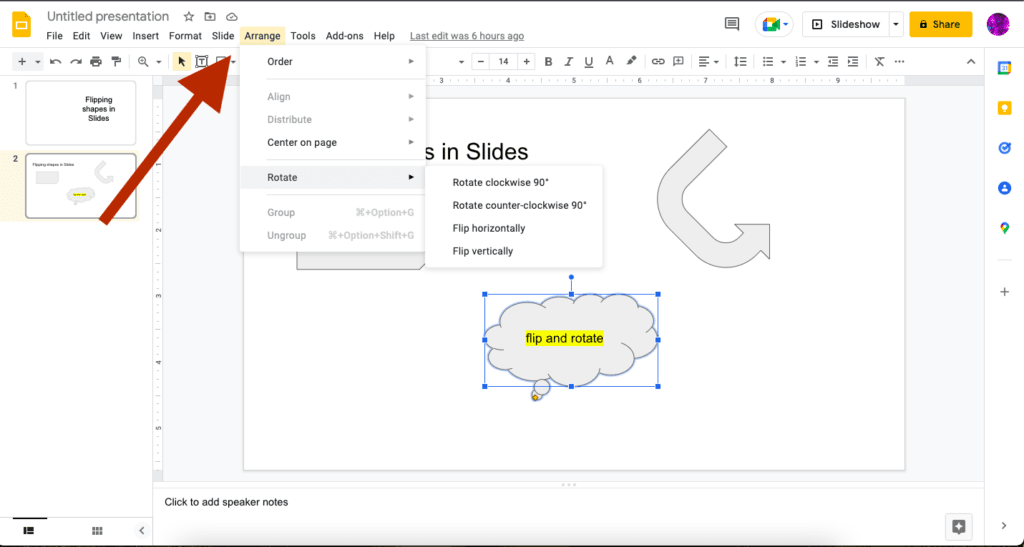
Let’s start by locating the arrange tab in the top toolbar menu. When you click this drop-down menu, you’ll see some options. The fourth option on the listing is rotate. When you float over rotate, a second menu appears with rotate and flip options.
Click “flip horizontally” and the shape will flip left and right. Click “flip vertically’ and the shape flips up or down.
Format tab
Another method for achieving the flip involves expanding some toolbar options as their own pop-up page. Let’s now find the format tab in the toolbar menu.
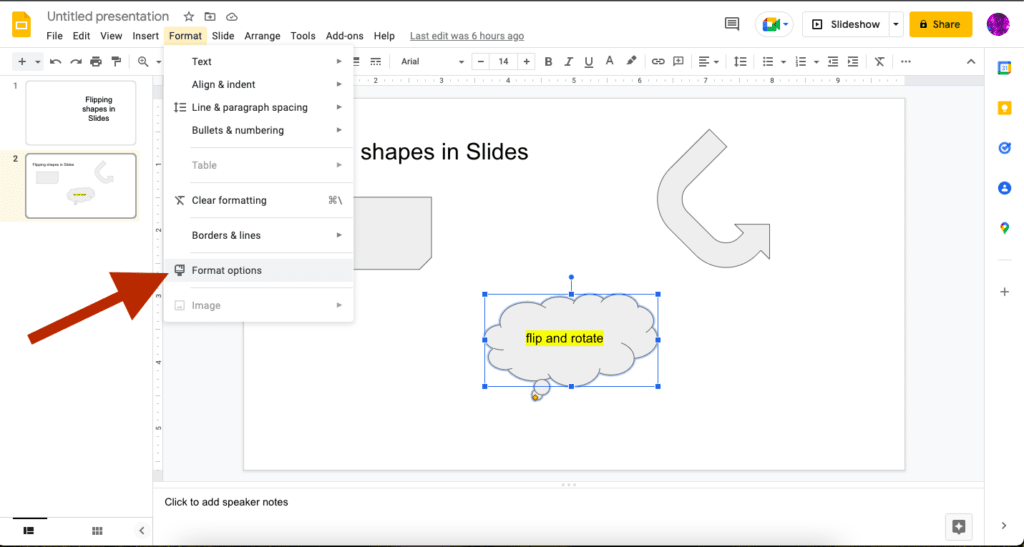
When you click format, a list of tools, functions, and commands will appear. Look for the command named format options. It should be near the bottom. Click it and a format options page will open up next to the slides on the right-hand side.
Under format options, look for the first choice, which is size & rotation. Click this drop-down menu option and you’ll see a more detailed adjustment page open.
At the bottom of the page, there is a rotate section. There is an icon for rotating, 90 degrees at a time. There are two flip options, one for horizontal and one for vertical. Remember, you’ll need to have clicked and selected the shape you’re going to flip before you click the flip commands.
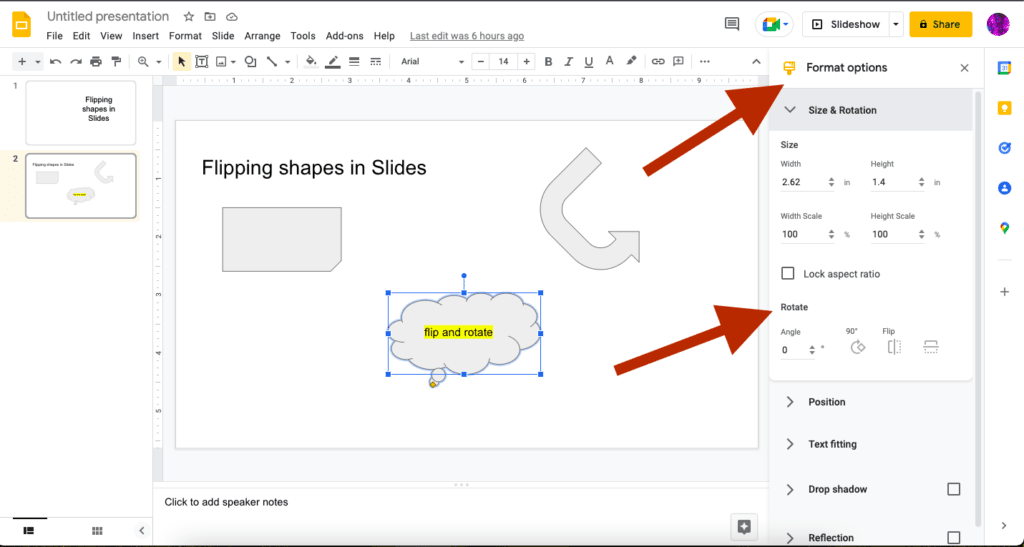
You’ll also see an adjustment for the angle of a shape, image, etc. Here, you can input a specific angle you need an image or shape to adhere to. Entering the numbers allows for finer adjustments to be achieved.
Once you’ve moved or flipped your image, you can close out the format options box by clicking the X in the right-hand corner.
Right hand/control click
Our third option involves directly clicking on the shape and opening a drop-down menu from there. If you’re using Windows, you’ll want to right-click on the mouse or trackpad. For Mac, you’ll use control + click.
Select your shape and open the drop-down menu, either as Mac or Windows. Approximately halfway down the menu, you’ll see the option called rotate. These are the same choices you had available by clicking the arrange tab, as described earlier.
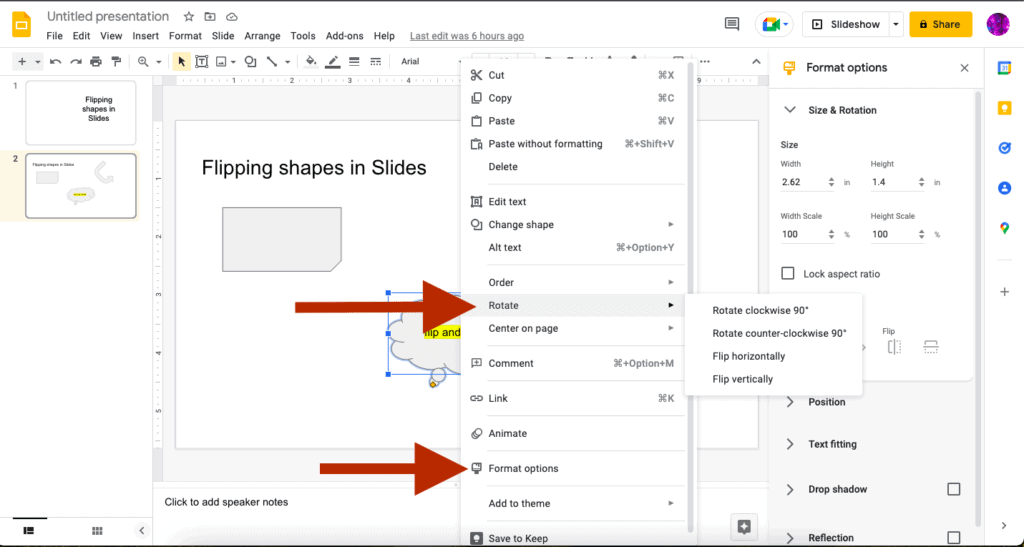
You’ll also notice that the format options command is available in this drop-down menu. Click it and the expanded page will show up on the right-hand side of Slides.
Text in shapes
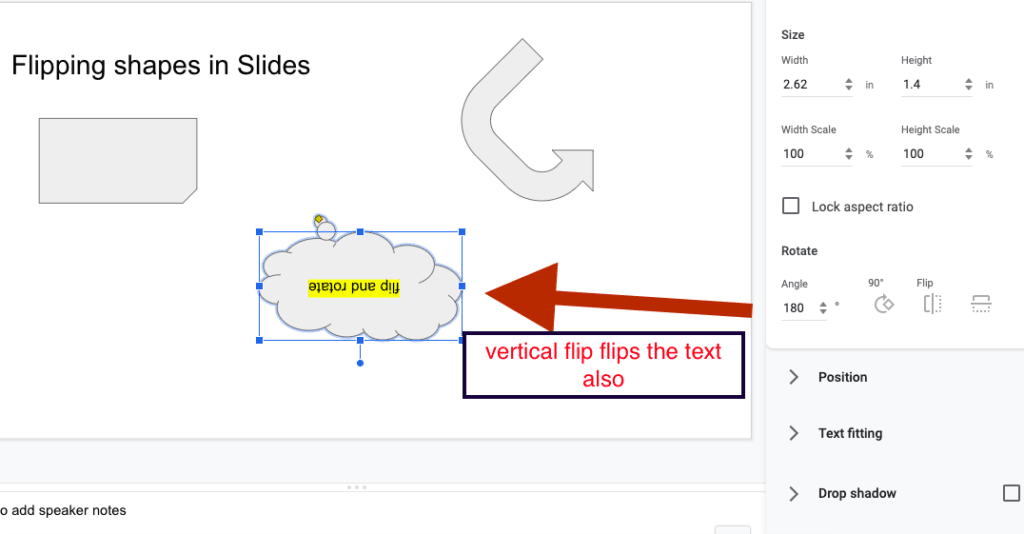
You may have noticed that there was text in the thought bubble shape. Did you see how the words looked in different flip positions?
If you flip a shape with text horizontally, the words can still be read as they usually appear.
If you flip vertically, though, the words will also flip vertically, and will appear upside down. Keep this in mind as you design your slides.
Bounding box
Remember when I said we’d talk more about the bounding box highlighting your shapes? You may have already figured this out, but the blue highlight line can be pulled to adjust the size and position of shapes, text, pictures, images, and other features used to create slide pages.
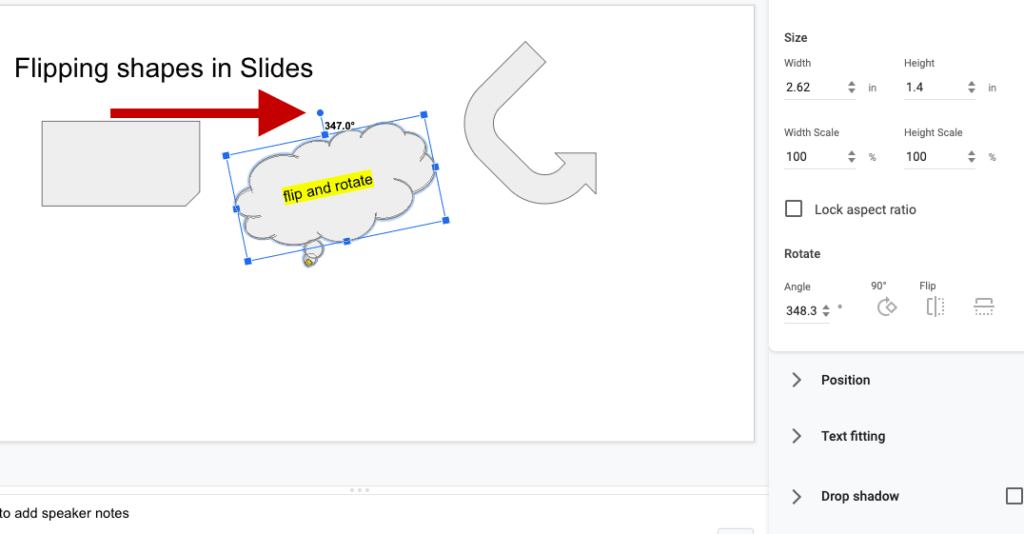
At the top of the highlighted shape, you’ll see a line sticking up with a small square on top of it. With your cursor, click and hold the blue square with your cursor. The binding box will now rotate 360 degrees. This feature gives you greater control over the angle and specific position of different shapes and other features.