Google Slides is a great program for creating presentations or teaching tools. Adding pictures to your presentation can enhance your audience’s interests as well as help convey your ideas. A picture collage can serve as a visual introduction to your main topic or as a supporting aid to better explain your concepts. In this article, we’ll look at how you can create a collage of pictures in Google Slides.
Table of Contents
Choose your layout
Google Slides assists users through the creative process with the menu toolbar at the top of the page. Become familiar with the features and functions available. It can be helpful to dedicate a couple of minutes to just explore and click each button, you may find a couple of tools you didn’t know of.
When you are adding pictures to a Google slide, you’ll want to consider the end goal. Do you need text, shapes, or lines as part of your picture collage? Are you going to focus on pictures only? Google Slides offers various slide layouts to match your needs.
On the far left side of the menu toolbar, you’ll see a plus sign and a down-facing arrow symbol. If you hover over this icon, the words new slide with layout will appear.
If you click the plus sign, a new slide that is the same as the last slide you created will be added. If you click the down arrow, you’ll open a window of slide format selections. Click the down arrow.
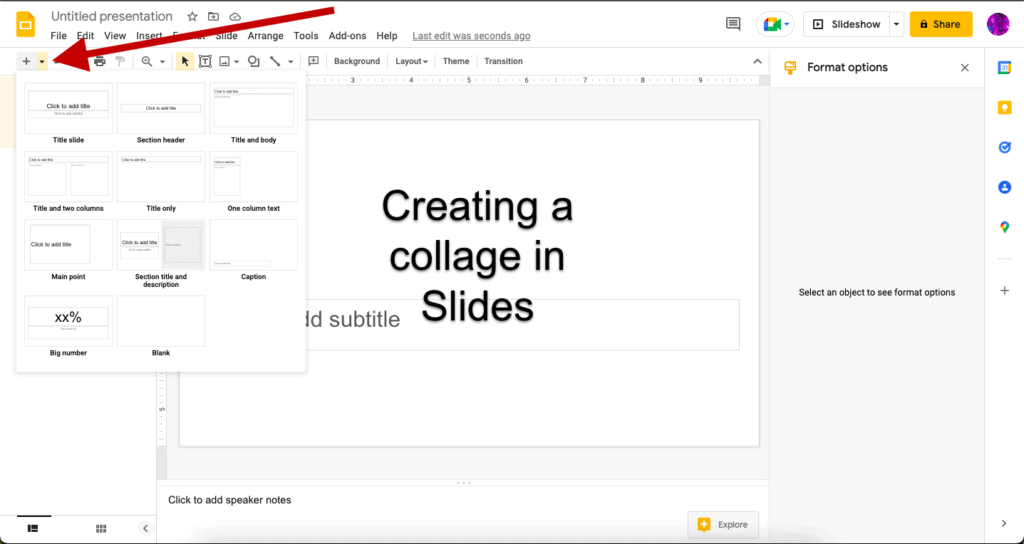
Looking over the choices, you’ll see slides with different configurations for titles, text, split screens, and comparisons, amongst others. Near the bottom, you’ll see a blank presentation slide. We’re going to choose this slide, as it will allow pictures to be imported without formatting issues changing where they appear.
Insert Image icon
Look back at your menu toolbar. Approximately halfway across the toolbar icons, you’ll find a box icon with a down arrow next to it. If you float over the icon, it’s called insert image. Click it and you’ll see a drop-down menu.
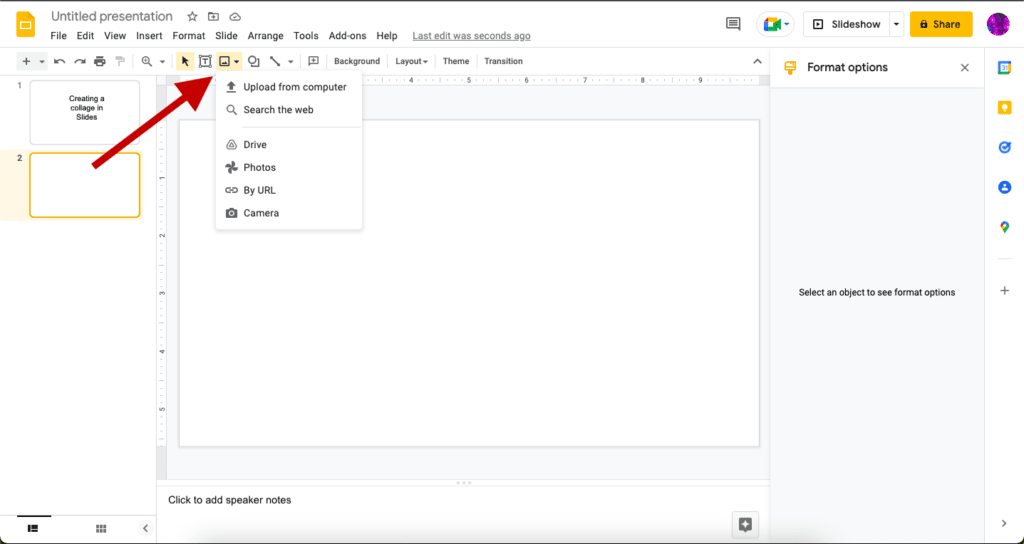
In the drop-down menu, you’ll see choices for the source of the picture you’re uploading.
- Upload from computer: Any picture you have on your computer can be uploaded and used in Google Slides.
- Search the web: Use Google’s search engine to find and upload pictures from the internet.
- Drive: Choose from pictures or images you’ve saved in Google Drive
- Photos: Choose from pictures you’ve saved on Google Photos.
- By URL: If you have a URL for a picture or image, you can pull it up and use it.
- Camera: You can use the camera on your device (laptop, desktop, mobile) to take and upload a picture.
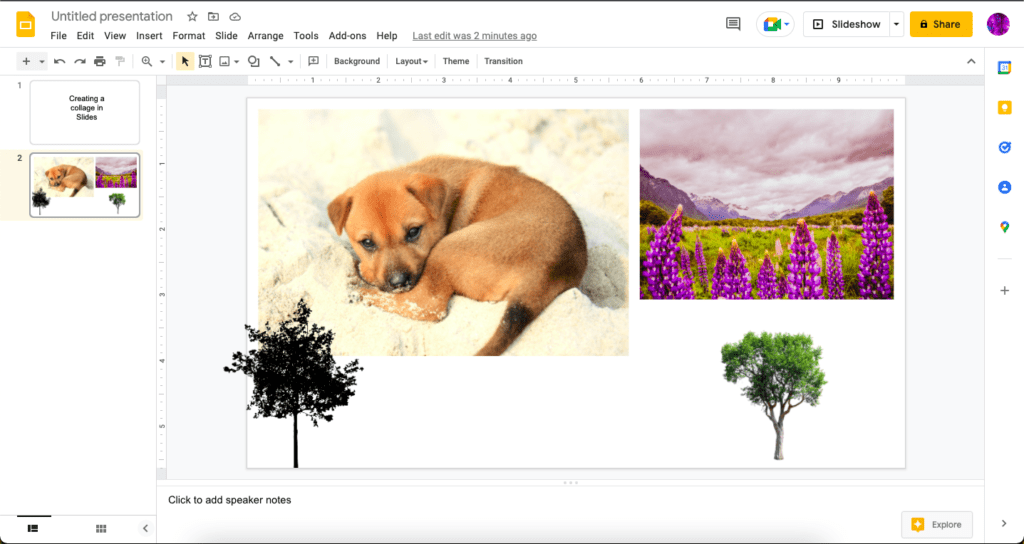
For this article, we’ll upload some pictures from the internet using search the web. When you find a picture you want, click insert and it will be added to your slide. I’ll start with a picture of a puppy.

Sizing and placement
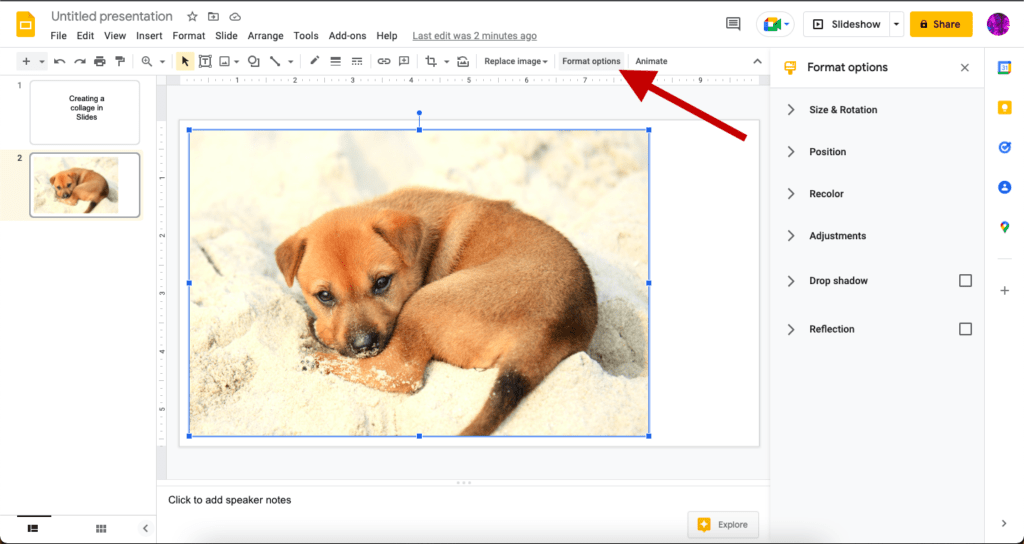
Your picture will have a blue box outlining the picture. This is called a binding box. It allows you to change the size and placement of the picture.
Look for the small blue squares on the box outline. These are your vectors for sizing, which you’ll grasp with your cursor.
- The corner squares change the overall picture size without changing the height or width of the image.
- The side squares change the height or width of the picture.
- A diagonal red line will appear across the image to show the original dimensions of the picture.
Format options
We’re going to make some adjustments to the pictures we upload, so let’s access our formatting options in a new window. In the menu toolbar, find the tab labeled format options towards the right side of the page.
note- you have to have a picture selected to access many options and functions, including opening the format options window.
Click format options and a new window will open on the right-hand side of Slides. This set of choices gives you expanded editing and image adjusting possibilities. We’ll revisit some of these adjustments a little later.
Picture order
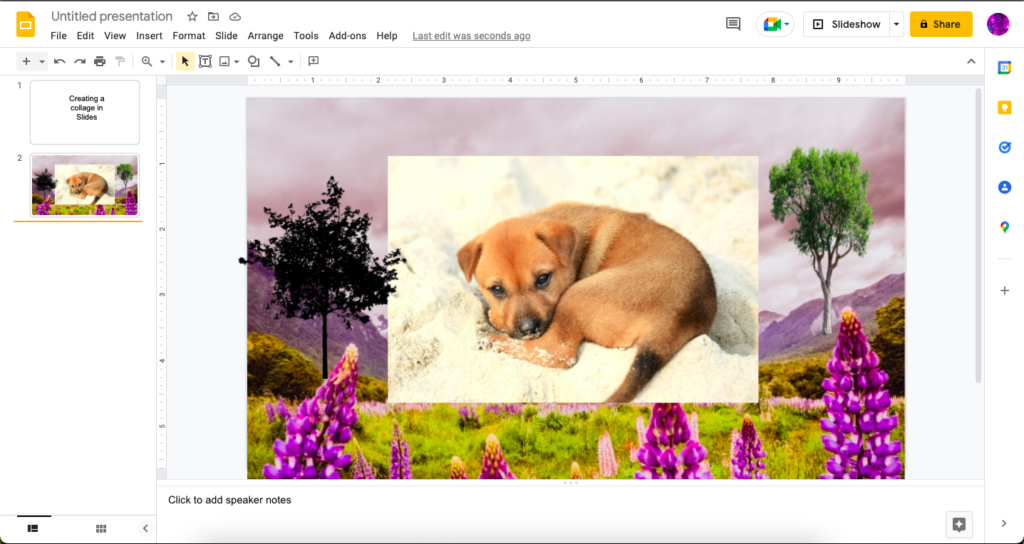
Once you upload more than one picture, you’ll want to start designating where the pictures will appear; foreground, mid-ground, or background. Let’s add some more pictures to our slide so we can explore these features.
OK, now we have more pictures. Click on one of the pictures to select it. Then right-click/control + click on the picture and a drop-down menu will appear. Look for order. Click it and another drop-down menu appears.
- Bring to front: moves the picture to the foreground
- Bring forward: moves a picture up one place in the order
- Send backward: moves a picture back one place in the order
- Send to back: moves the picture to the background
I want to move the flower field to the background, the puppy will be in the foreground, and the trees in the middle ground.
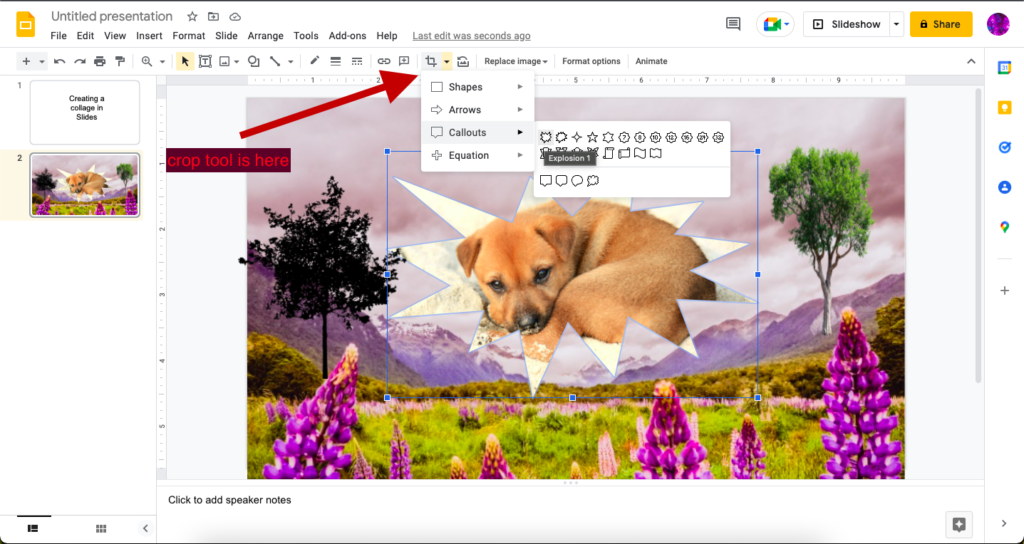
Picture shapes
Let’s say you want to change the shapes around the edges of the pictures. You’ll want to find the crop icon in the toolbar. Click the down arrow button next to the crop tool icon to open shape and image outlines. Your selected picture will fit the parameters of the shape you choose.
More format options
We talked about the format options tab and the formatting window which opens up. You can make other adjustments to your pictures with these format tools. Recoloring, adding shadows, reflections, a border, or transparency are all options to explore.
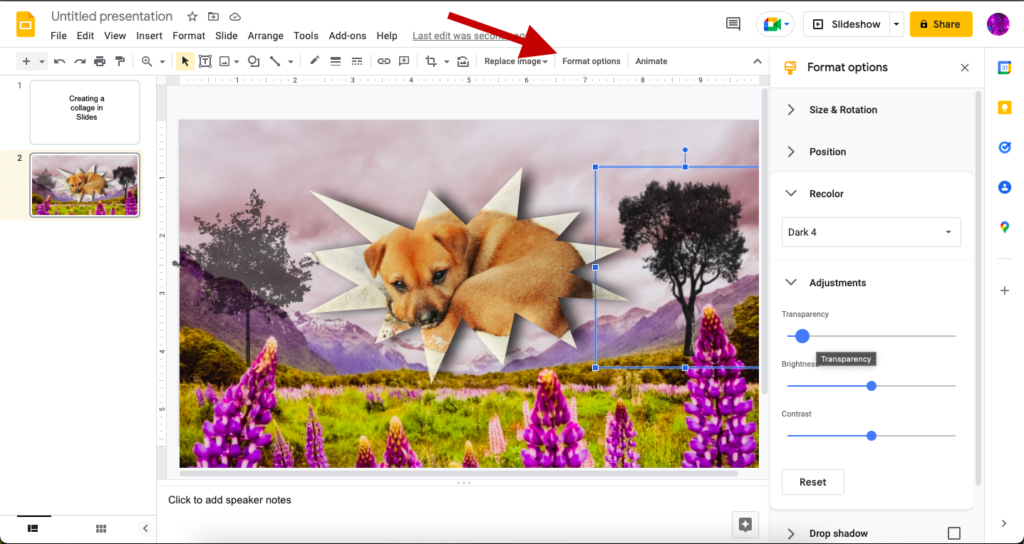
You can see that in our presentation we added some transparency to the trees so they blend a little better with the background in the finished collage. To learn more about transparency and how it can help you in your collage creation process, you can check our dedicated article about how to make a shape semi-transparent.
Conclusions
Google slides is probably not the perfect collage tool, as probably image manipulation software like Photoshop, Gimp or even Google Photos can be better and more powerful collage tools. However, with our tips, you can still create cool photo collages using Google’s powerful presentation tool.