Google Slides is an excellent program for creating presentations. Whether used as support media for a speaker’s presentation, or as a stand-alone, individually paced slide show, Slides fits the bill.
For certain situations, it can be advantageous to offer printed copies of your Slides presentation. Attendees, students, or prospective investors may want a physical copy on paper of your presentation to review or reference later. Today, we’ll look at how to print the presentation text, the actual presentation, and save your Google Slides presentation as a PDF.
Slides to PowerPoint
Currently, Google Slides doesn’t have an option to just print the text from a Slides presentation. There is a workaround, though. You’ll need PowerPoint on your computer or access to a computer with PowerPoint.
Most Windows-based PCs will have PowerPoint as an option. If you work with a Mac, though, this may not be readily available. See if a colleague or family member can assist you if you don’t have access to PowerPoint. You can also download PowerPoint to your Mac, but you’ll need to pay for Microsoft Office after the first month.
Start by finding your Slides presentation on your computer. I often save a copy on my desktop so it’s easy to locate. We’ll talk more about saving presentations later.
Open your saved Slides file with PowerPoint. Once the presentation opens in PowerPoint, look for the File tab at the top of the page and click it. At the bottom of this drop-down menu, you’ll see the Print command. Click it.
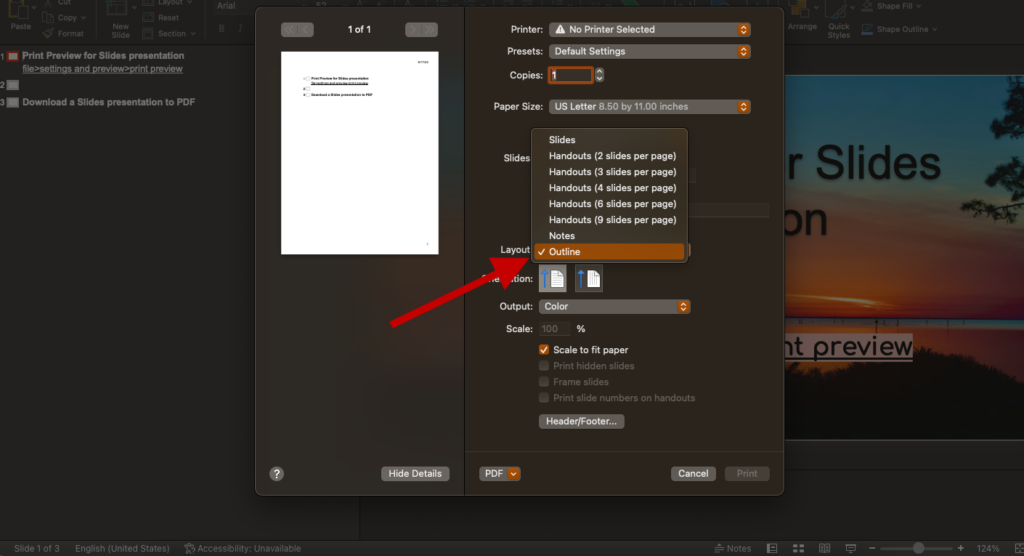
A separate Print window will open. In the middle of the Print window, you’ll see Layout. Click the drop-down menu for Layout. At the bottom of the list, you’ll see Outline. Choose this layout and only the text of your presentation will be shown. Click print and your presentation will print as text only.
Open your Slides file
Some of you may not be able to send or convert your Slides presentation to a PowerPoint. You can still print your presentation. You will just print the slides with the backgrounds as they appear in the presentation.
Start by navigating to Google Slides through the dot matrix in the right-hand corner of a Chrome browser window/tab. Once Slides opens, find the presentation you want to print and click on it to open it.
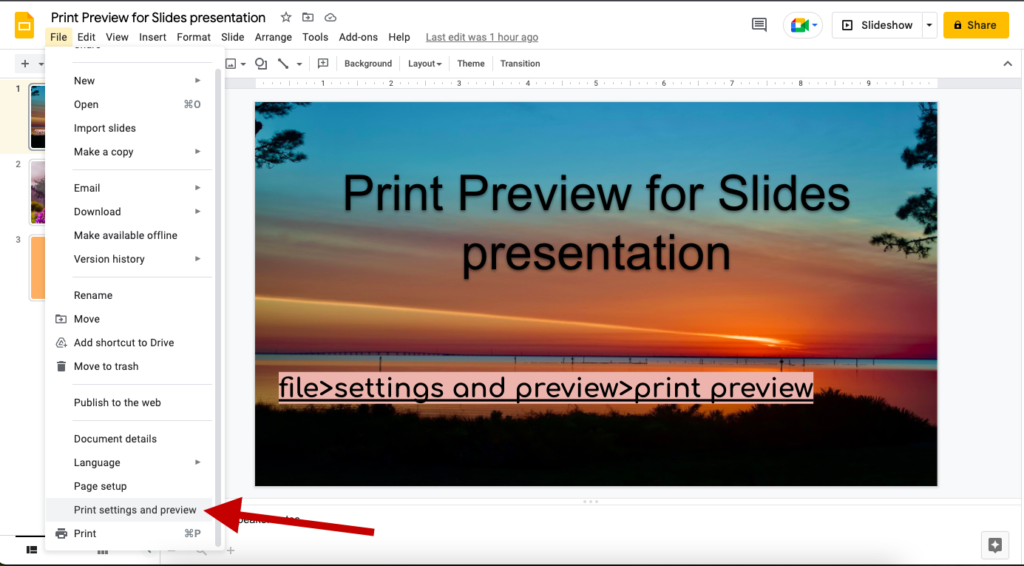
The project will appear as it does during the creation process. As with most Slides functions, we will be operating from the toolbar at the top of the Slides page. Look for the first tab called File. Click File and a drop-down menu will appear.
Near the bottom of the drop-down menu, you’ll see Print Settings and Preview. Click this function and your presentation will open up with a different page view. This page view shows you what your presentation will look like for an audience. It also gives you some different functions you can choose for your Slides presentation.
Print Preview and Print
Once you have opened your print preview settings window, you’ll see command functions across the top of the page. The command function all the way to the right is Print.
If a printer is detected by your computer:
- Print function allows you to print your presentation.
- Users can choose the number of pages they’ll print and which specific pages to print.
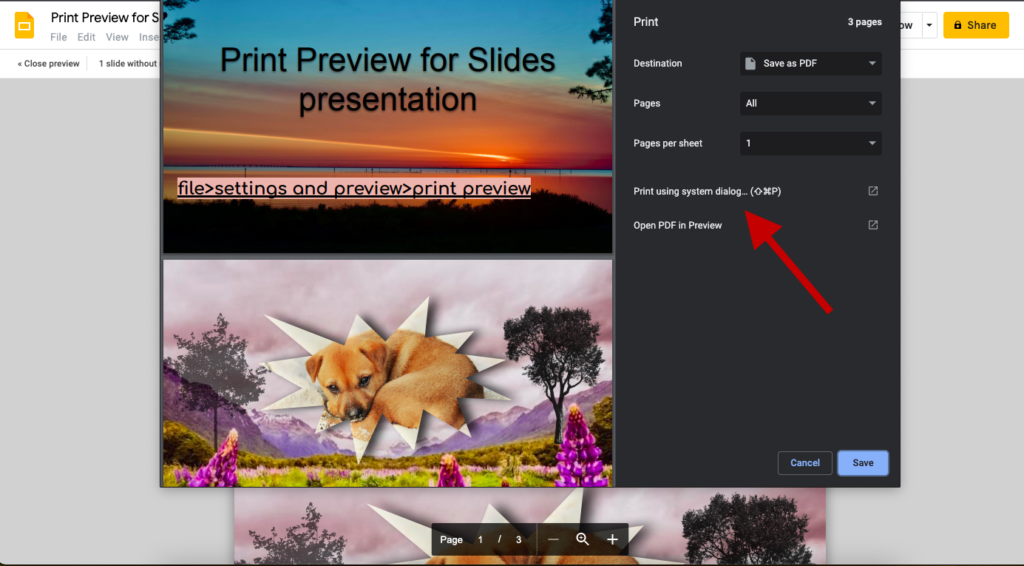
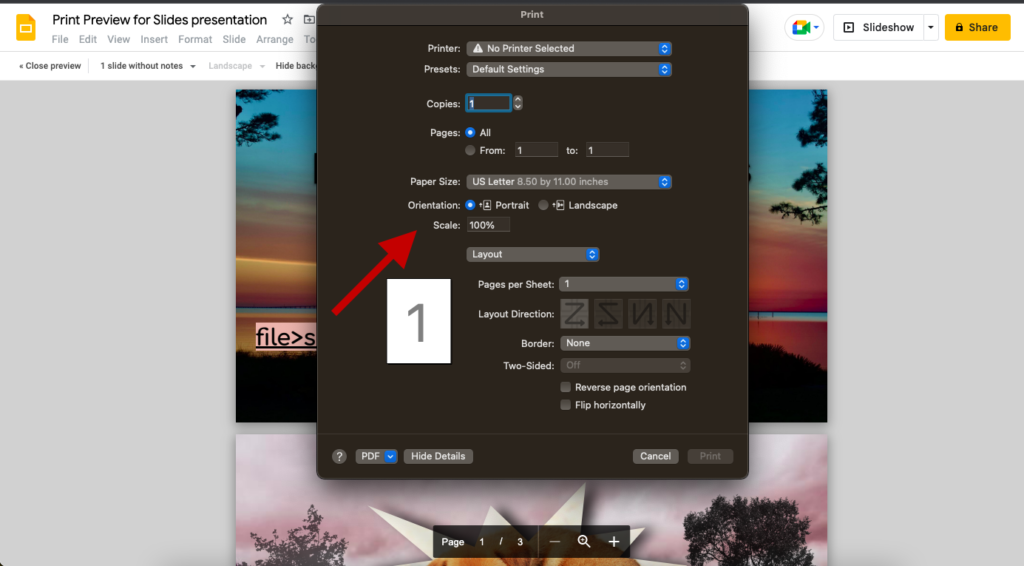
- Print using system dialog gives more specific options for print adjustments, including choosing a printer, changing the print layout, and paper size, or changing the scale and orientation of the printed pages.
Saving and converting to a PDF
In addition to printing presentations from Slides, some users may need to send the presentation via email or other messaging services. You may also want to keep a downloaded copy for future presentations. Your computer will save a copy of the presentation in the Slides program. There will also most likely be a saved copy on your computer, either in a drive or on your desktop.
With Google Slides, you can also save a copy to a PDF. PDF stands for Portable Document Format and, as it sounds, allows you to easily send or move these files from place to place.
Download as PDF
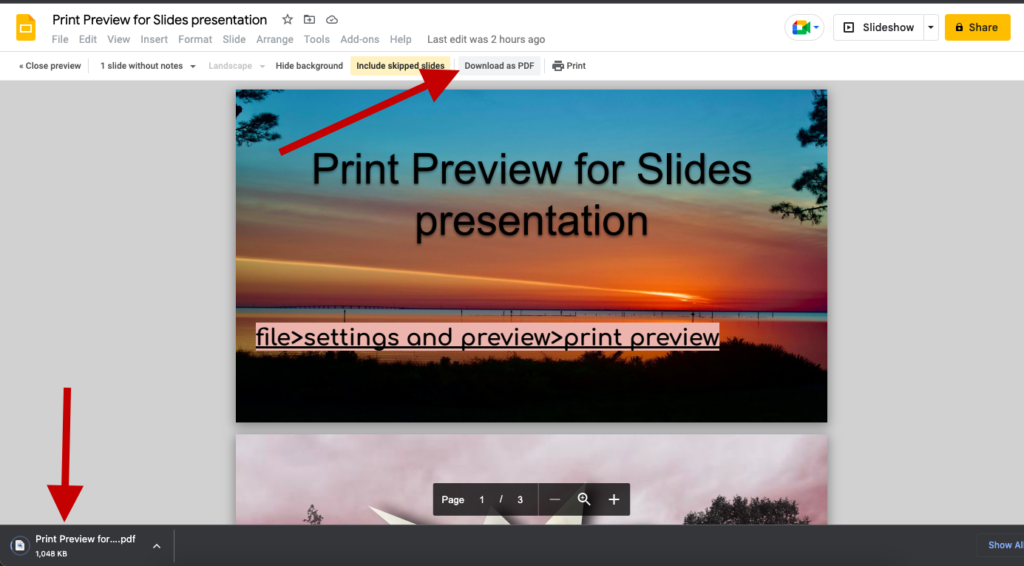
At the top of the Print Setting and Preview window, you’ll see a function command called Download as PDF next to the Print function. Click this function button and the Slides presentation will begin to save to your computer. Most saves will automatically go to a downloads file or a C drive, depending on if you’re using Mac or PC.
Once you’ve downloaded a PDF copy of the presentation, you’ll be able to send it or save it wherever you choose.
Save PDF from the Print screen
You can also save your presentation to a PDF by accessing the print screen window. When you clicked the Print button earlier, a separate print window opened. Click Print again, to open this window.
Near the top of this print window, you’ll see a choice of where you save the PDF called Destination. The default says Save as PDF. If you want to change the format you save with, you can click the drop-down menu to see other options.
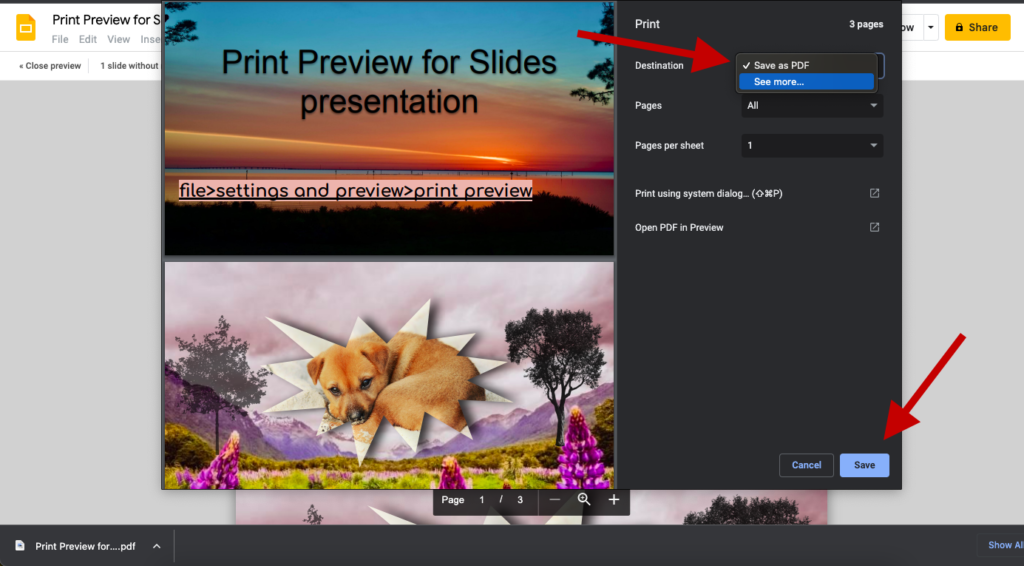
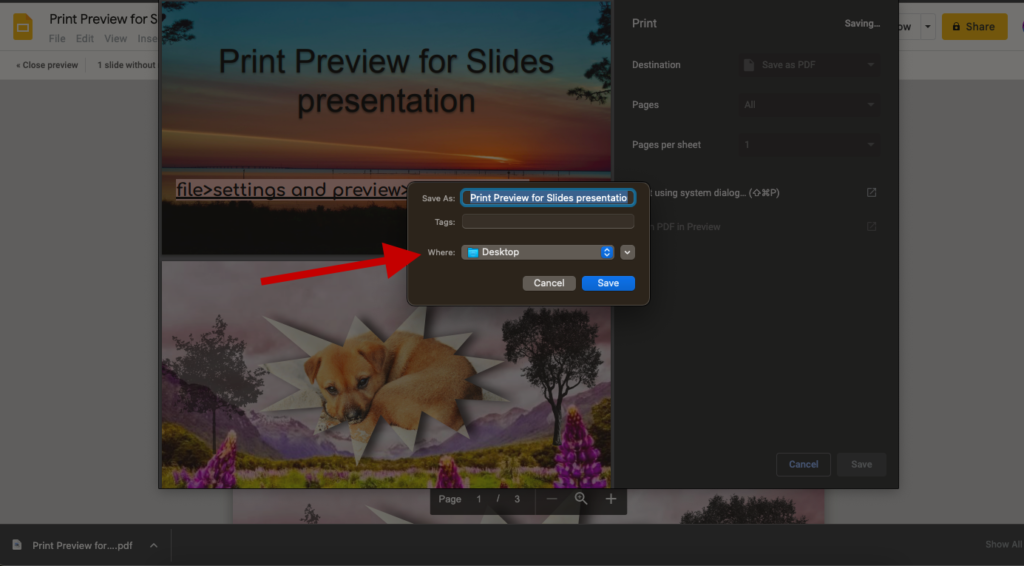
If you are saving as a PDF, you’ll move to the bottom of the Print window and click Save. When you click Save, you’ll open another window. Here, you can find options for where you’ll save the project document on your computer. Desktop is a good default, since you’ll be able to quickly find the file and move it where you like from the desktop location.
Now, you’ve successfully saved or printed your Google Slides presentation.