Have you ever needed to convert a Google Sheets table organized by rows to organized by columns? I had, and I found a really helpful feature to transform columns into rows.
That’s what transposing is all about, let’s see how to use it on google sheets!
What does transpose mean?
Let’s start with the definition from Wikipedia:
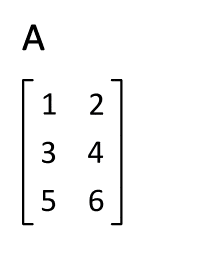
In linear algebra, the transpose of a matrix is an operator which flips a matrix over its diagonal; that is, it switches the row and column indices of the matrix A by producing another matrix, often denoted by AT (among other notations).
https://en.wikipedia.org/wiki/Transpose
Transposing is often used in algebra, where it’s applied to a matrix, but our Google Sheets tables are very similar to a matrix, so transposing a table is basically transforming every row to a column respecting the order (the first row becomes the first column, the second row the second column and so on…).
Wikipedia also has a nice animation about the transposition process, and an image is worth a thousand words, so here it is:
Using the paste transpose Google Sheets feature
The first method we’ll see is using the paste transpose option.
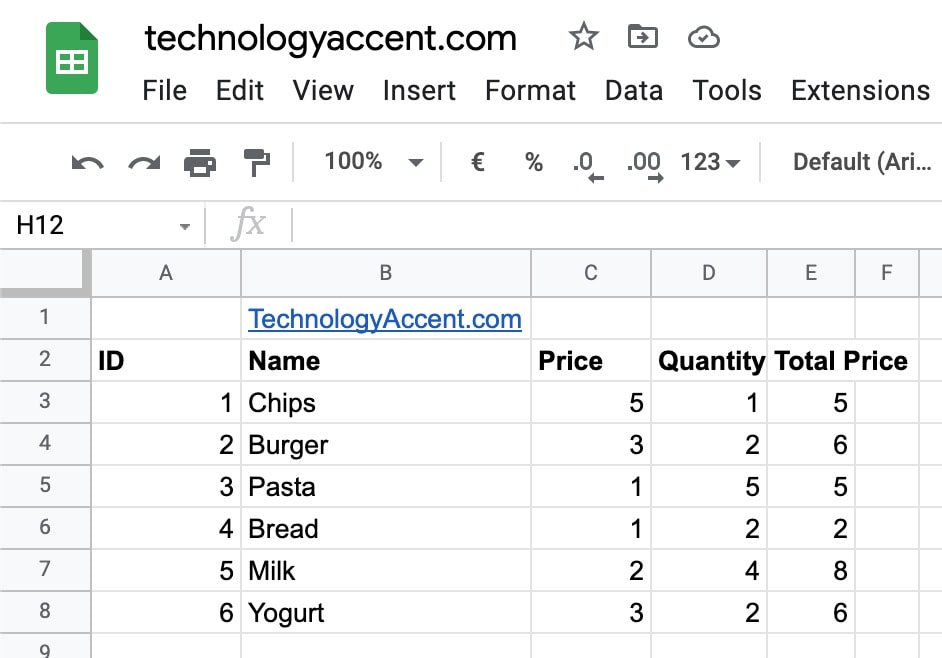
Our example document is similar to the one we used for the article about locking and unlocking cells, but this time the data is arranged in a not so common way:
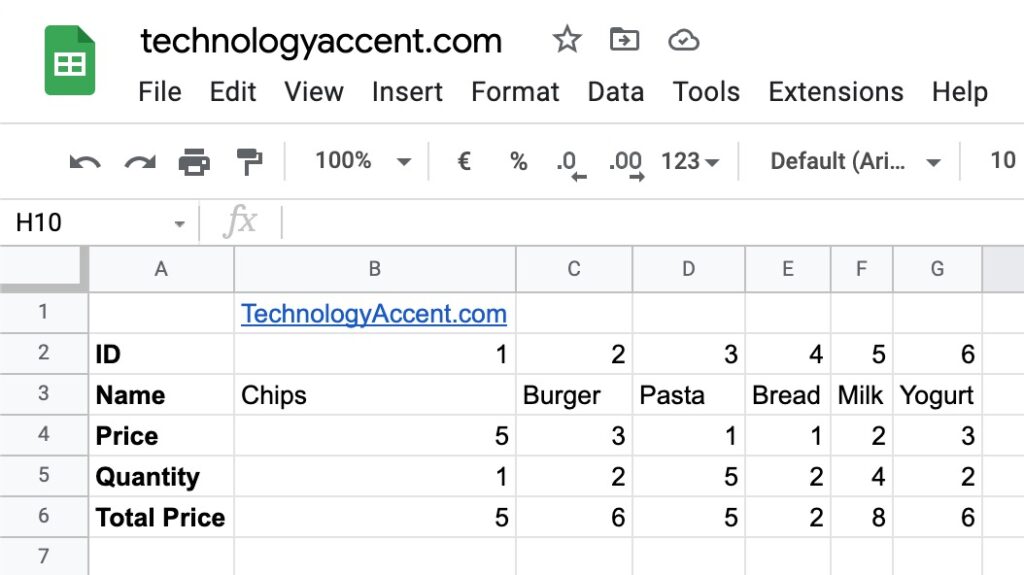
This way of representing this data is a bit odd, and it can result difficult to read, a better way to represent these data should be with ID, Name, Price, Quantity, and Total price as columns and not as rows.
In this example rewriting the whole data would not take too much time, but in many cases, with a lot of data, rewriting everything only to change the orientation is not a nice idea.
The right thing to do is get the help of google and let him do the heavy lifting.
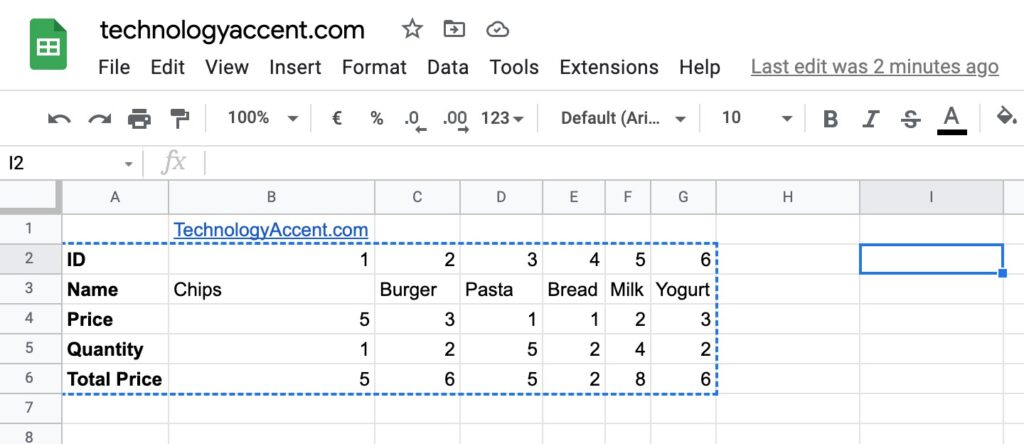
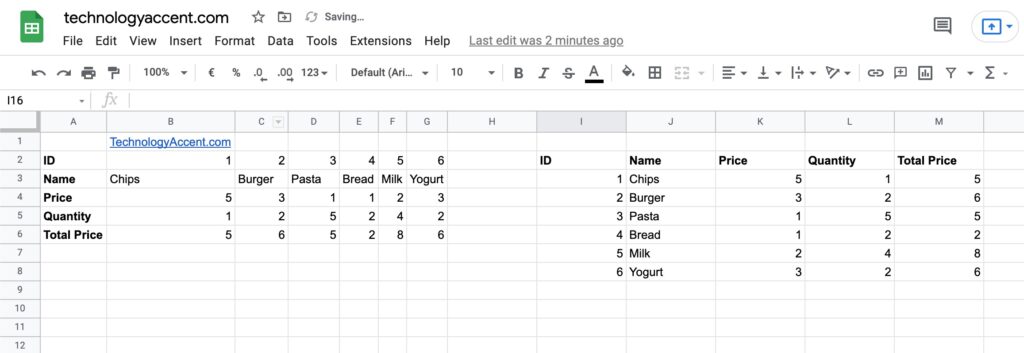
The first thing to do is select the range of cells we want to transpose. In our case, we have to select A2:G6.
Then you have to copy the range, either with a Ctrl + c, with the “edit” -> “copy” menu, or by right-clicking on the selection and then on “copy”.
Once you copied the range, you need to select where you want to paste the transposed table. You need even only a single cell, this will become the top-left cell of the new table.
You cannot delete the existing data before pasting the new table, so it’s best to paste it into an empty space on your sheet or on a different sheet (you can even create a temporary one).
For simplicity, we will place our selection in the I2 Cell
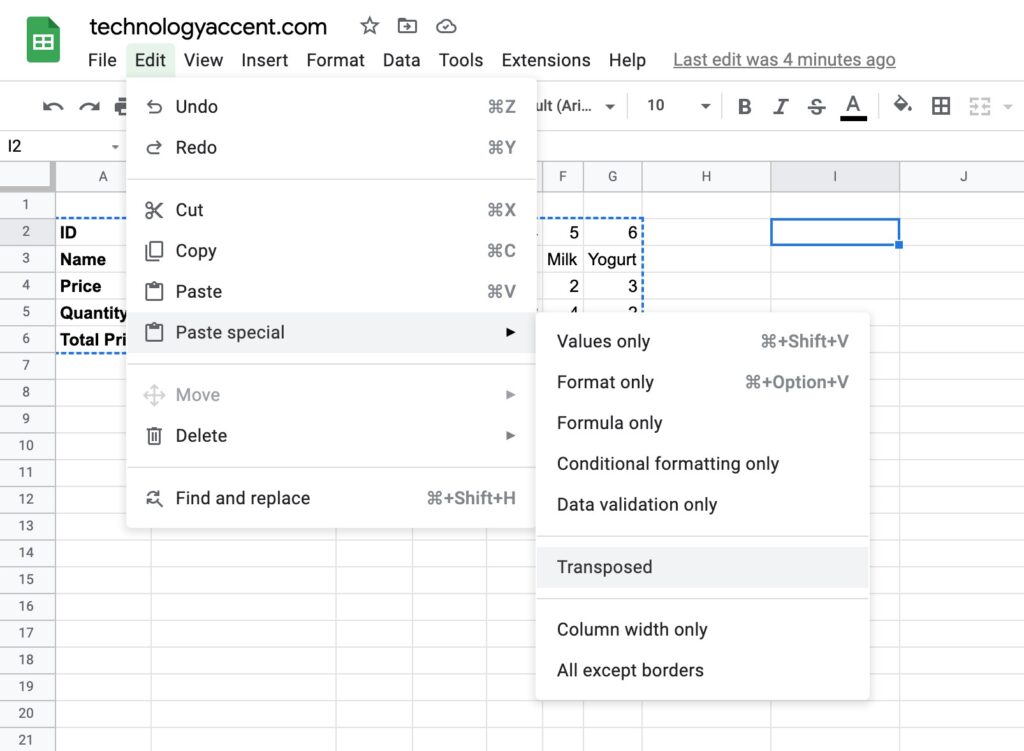
The next step is pasting the data, but you need to use a special option to transpose the values.
Right-click on the destination cell, or open the Edit menu, go into “Paste Special” and choose” Transposed”.
Once clicked, you should see the new table with the transposed orientation.
Using this method, a completely new dataset is created, so changing the values from the original table doesn’t influence the new data.
If you don’t need the original table and want to replace it with the new one, you can select the old data, delete it, then select the new transposed table, right-click on it and choose cut. Then select the Top-left cell of where you want to move the data (in our example A2), right-click and select Paste.
The finished result should be like this:
There are some things to keep in mind when using the copy-paste method to transpose data:
- The Paste Special function pasted data without checking if it’s overwriting cells with content. To avoid overwriting, a good practice could be creating a new sheet in the same Google Sheets document, to use as a temporary location to store the transposed data. Once you paste the new data into the temporary sheet, you can delete the original table, and copy the transposed data in the place of the original table.
- With this method, all the formatting (including bold, underlined text, and the merged cells) is preserved.
This article is part of our productivity tips for Google Sheets series. You can find them all on our Tips and tricks for Google Sheets page.
How to use the TRANSPOSE function
There’s another way to transpose your data that you should know.
This is a different way, and there are situations where using the past transpose option is enough, and others where the TRANSPOSE function is better. So you should know both and decide every time which one fits better for each situation.
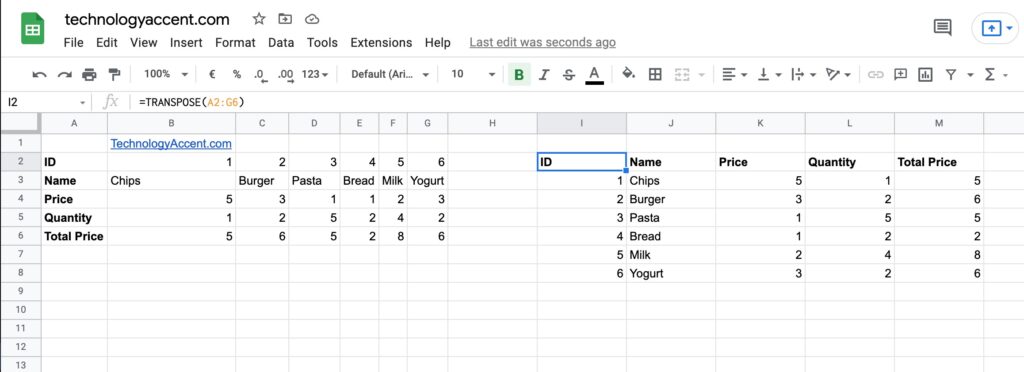
The transpose function is really easy to write, as it takes only an argument: the range of cells you want to transpose.
So in our example, we would just write
=TRANSPOSE(A2:G6)In our example, we can write this formula in the I2 cell, and get the transposed table.
Using the TRANSPOSE function has some big differences compared to the previous methods you should be aware of when choosing what method you want to use:
- The new table is directly linked to the original one, so every change you make on the original dataset will reflect on the transposed one.
- If you try to edit a value on the transposed table, Google Sheets will throw an error like “Array result was not expanded because it would overwrite data in I4.”
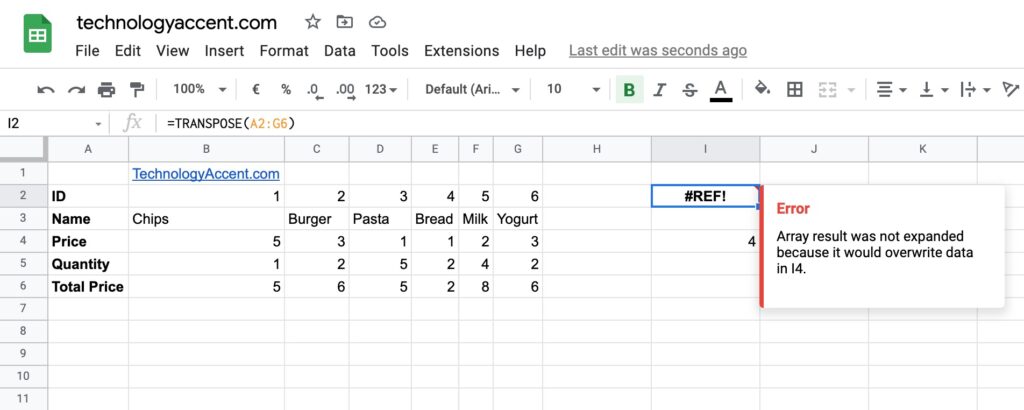
- The Top-left cell is key, so if you edit or delete it, the entire new table will be deleted.
- The Formatting is not transposed like with the Paste Special method.
What are some use cases of each method?
The Paste Special method can be used in many situations:
- If you have/receive a table and you want to flip rows and columns before starting to work on it.
- If you have started to work in a way and then you realize that you want to change the orientation from row to column and then keep working on the new orientation
The TRANSPOSE function can be a better alternative for your Google Sheets:
- When you need to keep the original orientation but want to view the data in the transposed data.
- If you periodically import from an external source, and you want to view the data in the transposed orientation, and even apply additional formulas based on the transposed version.
- The TRANSPOSE function can be handy if you transpose the data from one sheet to another, so you can have the original data in a sheet, and the transposed in a different one.
- You want to preserve the link between the source data and the transposed view so that when you modify the source, the view gets automatically updated.
Conclusions
Being able to transpose data on google sheets is a great resource, as it can help to format data and handle poorly organized tables!